vuepress搭建静态博客
VuePress简介
VuePress是以Vue驱动的静态网站生成器,是一个由Vue、Vue Router和webpack驱动的单页应用。在VuePress中,你可以使用Markdown编写文档,然后生成网页,每一个由VuePress生成的页面都带有预渲染好的HTML,也因此具有非常好的加载性能和搜索引擎优化。同时,一旦页面被加载,Vue将接管这些静态内容,并将其转换成一个完整的单页应用,其他的页面则会只在用户浏览到的时候才按需加载。
详情请看 VuePress官方文档
VuePress特性
- 为技术文档而优化的内置Markdown拓展
- 在Markdown文件中使用Vue组件的能力
- Vue驱动的自定义主题系统
- 自动生成Service Worker(支持PWA)
- Google Analytics集成
- 基于Git的"最后更新时间"
- 多语言支持
- 响应式布局
环境搭建
VuePress安装条件
Yarn或npm- Node.js version >=8。
全局安装VuePress
> yarn global add vuepress
或者:
> npm install -g vuepress
项目编辑
创建项目目录
> mkdir vuepressDemo
> cd vuepressDemo
初始化项目
> yarn init -y
或者
> npm init -y
新建docs文件夹
docs文件夹作为项目文档根目录,主要放置Markdown类型的文章和.vuepress文件夹。
> mkdir docs
设置package.json
VuePress中有两个命令:
vuepress dev docs, 命令运行本地服务,通过访问http://localhost:8080即可预览网站vuepress build docs, 命令用来生成静态文件,默认情况下,放置在docs/.vuepress/dist目录中,当然你也可以在docs/.vuepress/config.js中的dest字段来修改默认存放目录。
在这里将两个命令封装成脚本的方式,直接使用npm run dev和npm run build即可。
{
  "scripts": {
    "dev": "vuepress dev docs",
    "build": "vuepress build docs"
  }
}
创建.vuepress目录
在docs目录中,创建.vuepress目录,.vuepress目录主要用于存放VuePress相关的文件。
> mkdir .vuepress
创建config.js
进入到.vuepress目录中,然后创建config.js,config.js是VuePress必要的配置文件,它导出一个javascript对象
> touch config.js
创建public文件夹
进入到.vuepress目录中,然后创建public文件夹,此文件夹主要放静态资源文件,例如favicons和 PWA的图标。
> mkdir public
项目目录结构
此时,项目的结构可能如下:
vuepressDemo
├─── docs
│   ├── README.md
│   └── .vuepress
│       ├── public
│       └── config.js
└── package.json
网站信息
以上只是简单了搭建了一下博客的开发环境,接下来是博客主要的基本配置config.js,也是必须要做的。
config.js的配置可能如下:
module.exports = {
    title: '个人主页',
    description: '姜帅杰的博客',
    head: [
        ['link', { rel: 'icon', href: '/img/logo.ico' }],
        ['link', { rel: 'manifest', href: '/manifest.json' }],
    ]
}
- title:网站标题
- description:网站描述
- head:额外的需要被注入到当前页面的HTML"head"中的标签,其中路径的"/"就是public资源目录。
具体配置详情请看文档:VuePress config配置
主题配置
在config.js中添加主题相关的配置, 如下添加了:
- 顶部导航配置
- 左侧导航栏配置
- 更多配置信息可以查看 VuePress config配置
module.exports = {
  title: 'Web Developer',  // 设置网站标题
  description : 'Web developer',
  base : '/coding/',
  themeConfig : {
    header: {
      background: {
        // url: '/assets/img/bg.jpg',
        useGeo: true,
      },
      showTitle: true,
    },

    lastUpdated: true,

    nav : [
        {
          text: 'Web',
          link: '/css/',
          items: [
            {
              text: 'CSS',
              link: '/css/'
            },
            {
              text: 'HTML',
              link: '/html/'
            },
            {
              text: 'JavaScript',
              link: '/js/'
            },
            {
              text: 'Vue',
              link: '/vue/'
            }
          ]
        },
        {
          text: 'Tools',
          link: '/',
          items: [
            {
              text: 'Git',
              link: '/git/'
            }
          ]
        },
        {
          text: 'Github',
          link: 'https://github.com/hijameszhang/coding'
        }
    ],
    sidebar: {
      '/css/': [
        {
          title: 'CSS',
          collapsable: true,
          children: [
            '',
            'basis',
            'layout'
          ]
        }
      ],
      '/html/': [
        {
          title: 'HTML',
          collapsable: true,
          children: [
            '',
            'demo'
          ]
        }
      ],
      '/js/': [
        {
          title: 'JavaScript',
          collapsable: true,
          children: [
            '',
            'ifElseRefactor'
          ]
        }
      ],
      '/vue/': [
        {
          title: 'Vue',
          collapsable: true,
          children: [
            '',
            'vuepressToGithub'
          ]
        }
      ],
      '/git/': [
        {
          title: 'Git',
          collapsable: true,
          children: [
            '',
            'github'
          ]
        }
      ]
    },
    sidebarDepth : 6
  }
}
- nav:导航栏配置,此配置主要用于配置导航栏的链接,例如以上主页的link为"/",默认是根目录下的
README.md。"/js/"链接到根目录docs下的js文件夹下的README.md文件。 - sidebar:侧边栏配置,你可以省略.md拓展名,同时以/结尾的路径将会被视为
/README.md。'/js/'、'/css/'和'/html/'是通过路由的方式将每个页面的标题抽取出来显示。"/js/"是指根目录下js文件夹中的路由,每个路由链接都要有README.md。所以目录结构如下:
├─── docs
├── README.md
└── js
│   └── README.md
└── html
|   └── README.md
|   └── demo.md
└── css
   └── README.md
- sidebarDepth:嵌套的标题链接深度,默认的深度为1,这里把它改成了 6.
- lastUpdated:最后更新时间。
PWA配置
VuePress默认支持PWA配置的,需要在基本配置中开启serviceWorker。
module.exports = {
     serviceWorker: true,
}
然后再添加icons和Manifest配置,在public中添加manifest.json配置,和图标。如果不知道PWA的可以到PWA配置查看相关资料。
自定义页面
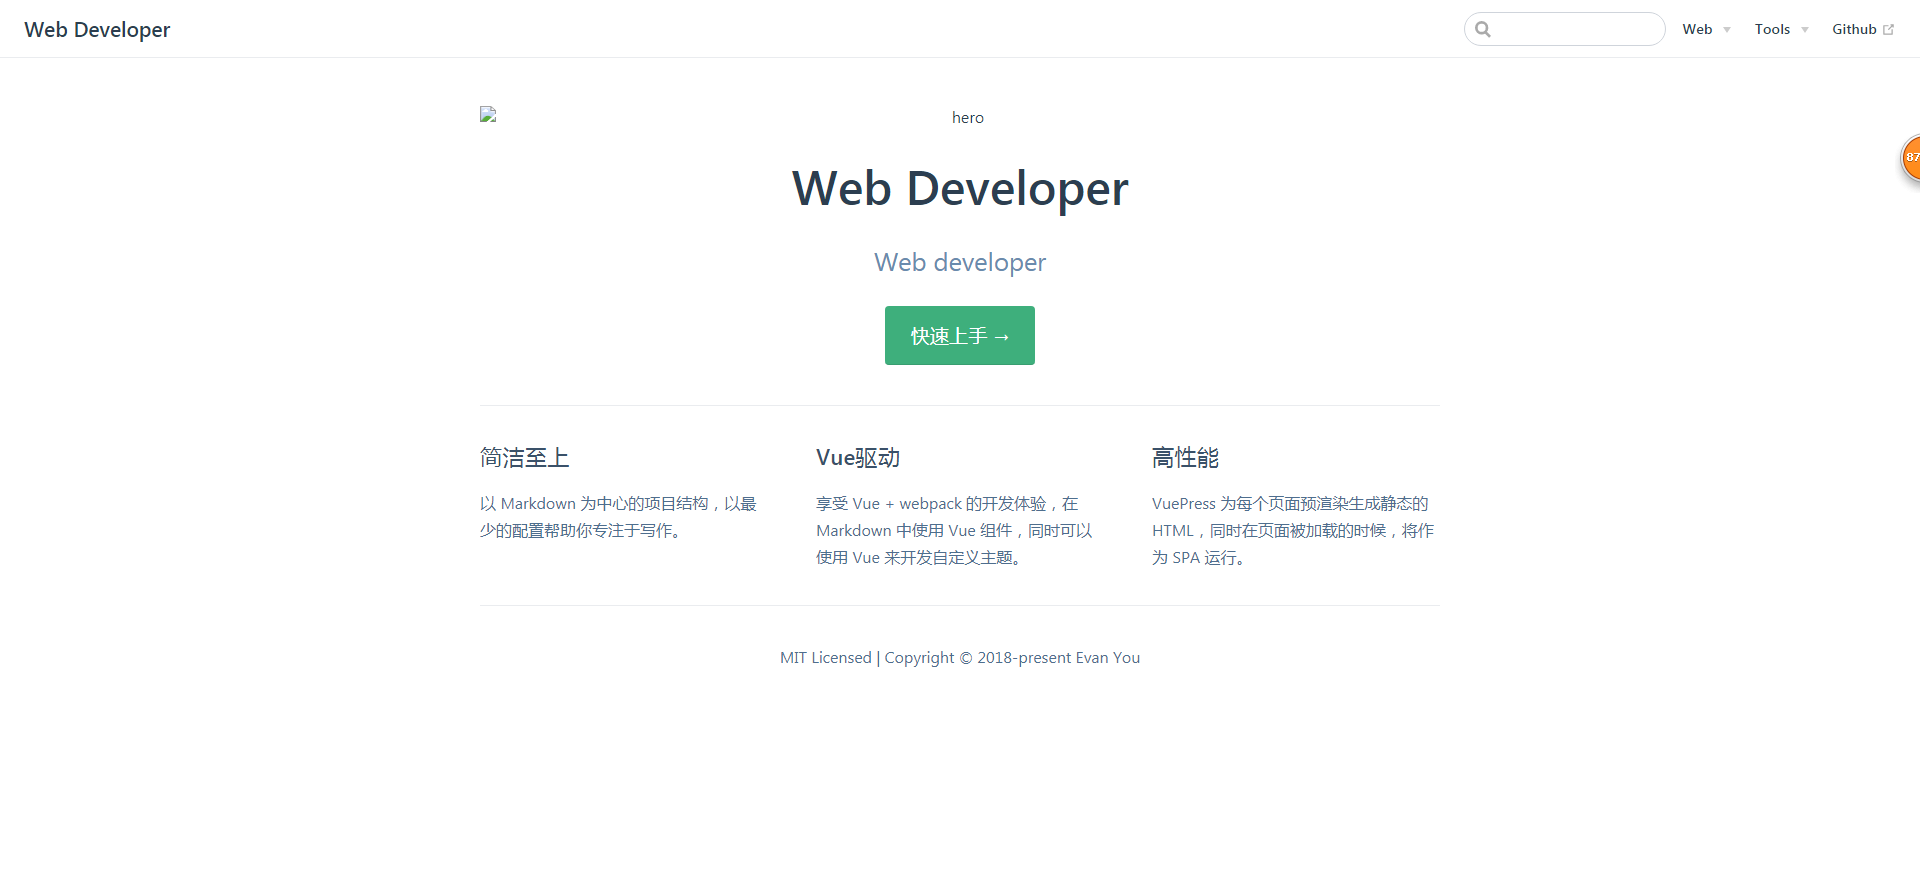
默认的主题提供了一个首页(Homepage)的布局(用于这个网站的主页)。想要使用它,需要在你的根级 README.md的home: true,然后添加数据。
---
home: true
heroImage: /hero.png
actionText: 快速上手 →
actionLink: /zh/guide/
features:
- title: 简洁至上
  details: 以 Markdown 为中心的项目结构,以最少的配置帮助你专注于写作。
- title: Vue驱动
  details: 享受 Vue + webpack 的开发体验,在 Markdown 中使用 Vue 组件,同时可以使用 Vue 来开发自定义主题。
- title: 高性能
  details: VuePress 为每个页面预渲染生成静态的 HTML,同时在页面被加载的时候,将作为 SPA 运行。
footer: MIT Licensed | Copyright © 2018-present Evan You
---
效果如下:
如果你想自定义首页或者其他页面,可以在页面的md文件中添加页面Vue文件。Vue文件放置在docs/.vuepress/components目录中。
---
layout: HomeLayout
---
VuePress中所有的组件都会放在.vuepress/components目录下, 并以全局的方式注入.
详细资料可查看VuePress在Markdown中使用Vue
部署上线
由于构建的时候生成静态页面,所以将dist文件夹中的内容可以部署在gitHub的pages中。如果使用git上传到github上,操作比较繁琐,这里使用脚本的方式自动部署到github上。
创建一个deploy.bat
在vuepressDemo下创建deploy.sh。
> touch deploy.bat
编写脚本
cd docs/.vuepress/dist
git init
git add -A
git commit -m 'deploy'
// 强制推送代码到我在github上注册的一个名为hijameszhang的组织下的coding仓库中
git push -f git@github.com:hijameszhang/coding.git master
设置package.json
{
    "scripts": {
        "deploy": "npm run build && deploy.bat"
      },
}
或者:
{ "scripts": { "deploy": "yarn run build && deploy.bat" }, }
运行npm run deploy或yarn run deploy 即可自动构建部署到github上。
详细资料可查阅VuePress部署
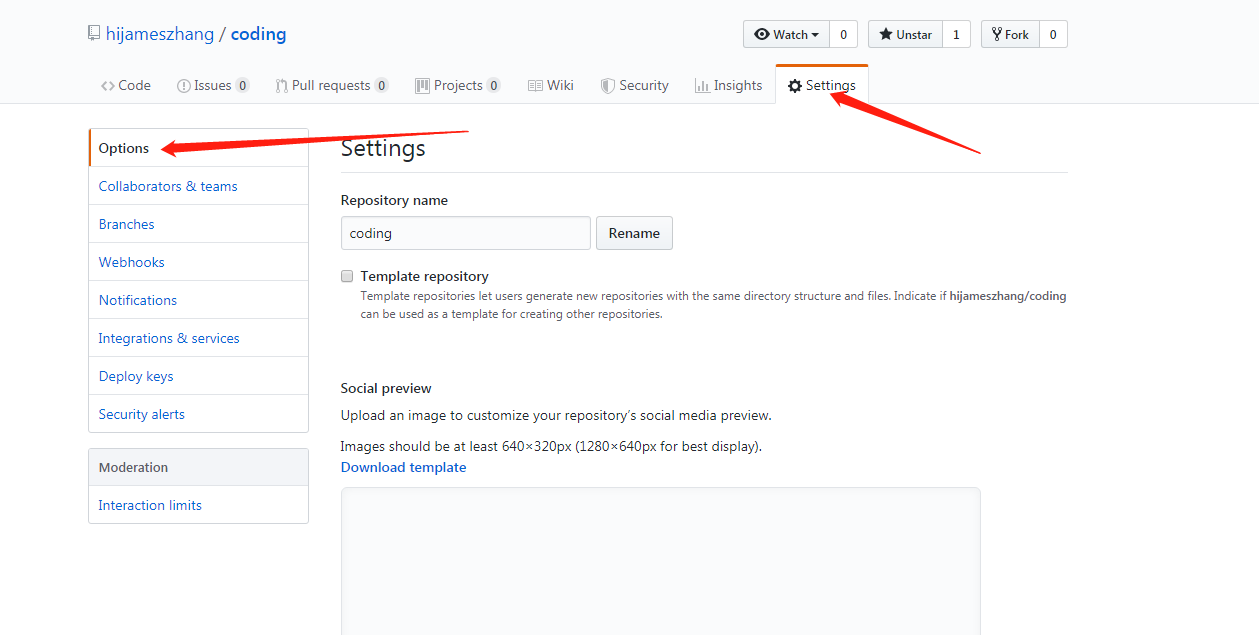
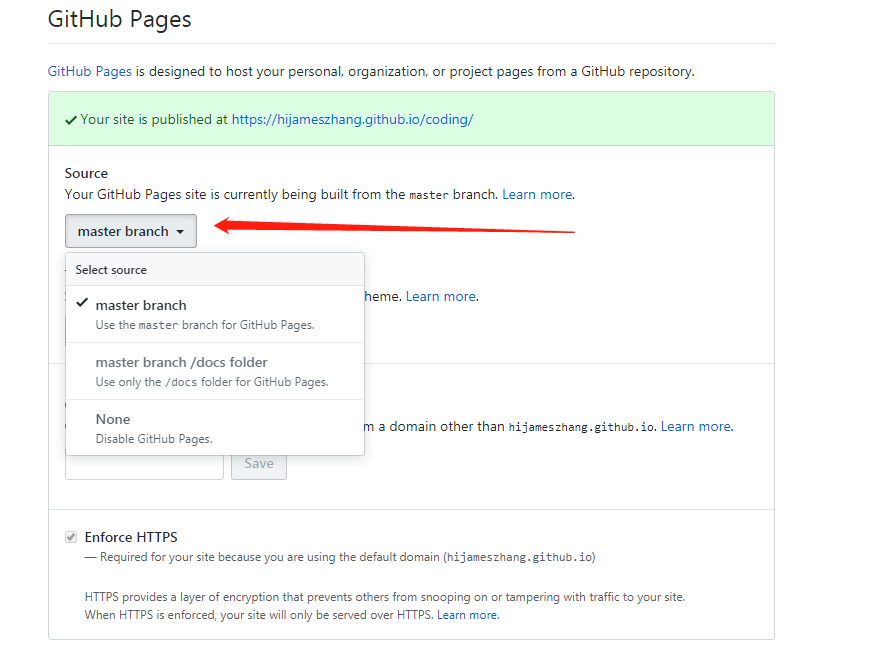
Github Pages 设置
小技巧
因为GitHub Pages只有3个选项:
- master branch
- master branch/docs folder
- None(Disable Github Pages)
为了能让站点正常发布, 我新建了一个docs分支, 因此工程当中有两个分支:
- docs, 用于存储源代码
- master, 用于存储
npm run build后的代码, 便于发布到Github的静态站点中.
因此, 在deploy.bat中可以看到:
// 强制推送代码到我在github上注册的一个名为hijameszhang的组织下的coding仓库中
git push -f git@github.com:hijameszhang/coding.git master
为了方便查看源代码, 还需要设置一下默认的分支:

遇到的问题
在利用vuepress构建静态站点时, 发现提交代码到github时会出错:
E:\github\coding>git push --set-upstream origin master
ERROR: Permission to hijameszhang/coding.git denied to jameszhang2020.
fatal: Could not read from remote repository.

Please make sure you have the correct access rights
and the repository exists.
原因是我本地电脑存储了两个或以上的github ssh key. 解决办法请参见我的另一篇文章: git使用小技巧--多个github帐号-推送出错